When I heard that Boston was going to get 2-3 feet of snow earlier this week, I decided to make lemonade from lemons by snow dyeing fabric, using some of that snow. The day before the storm, I prepared 9 colors of dye concentrate. I also scoured some fabric so it would be ready for snow dyeing.
The following tutorial goes through all the steps involved in snow dyeing, with illustrations of many of these steps.
1. Scour (wash) the fabric to remove any dirt or finishes. Do this in the washing machine. For 8 yards of fabric, I used 3 tablespoons of soda ash and a teaspoon of Synthrapol. I washed the fabric using a hot cycle. At the end of the cycle, I still had some suds in my fabric, perhaps because I used too much Synthrapol, so I did a second short, hot wash. I then hung the fabric over the shower rod to dry. (The fabric I used was Testfabrics 419, a closely woven cotton fabric.) You can use any plant-based fabric for the snow dyeing process.
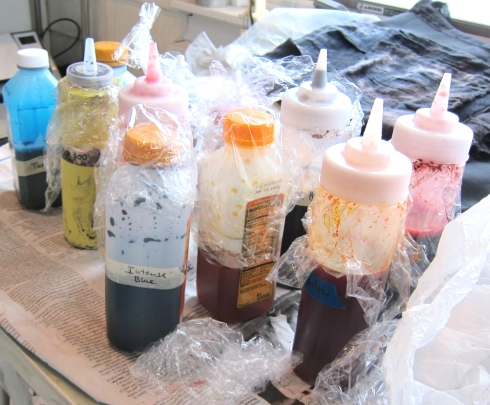
2. Using Procion MX dyes, mix up 5% dye concentrates, wearing a face mask whenever you are working with dye powder. For each color, I added 10 grams of dye powder (about 2 teaspoons), plus 1/2 tablespoon granular urea, to 200 ml. of water (a little less than 1 cup). I mixed the concentrates in bottles with tight caps by shaking them thoroughly. If the dye powder didn’t fully dissolve after being well shaken, I stirred the dye concentrate with a chopstick to dissolve the last particles. The colors I chose for this dyeing session were black, dark brown, rust, gunmetal gray, scarlet, mixing red, lemon yellow, golden yellow, bright blue and navy. Several of these dyes were several years old, but I didn’t care if the colors were exact since I would be doing a lot of mixing of colors. The black, brown, gray and rust are all colors mixed by the dye house from different pure colors, so this meant that I would be likely to get a lot of color splits and new colors as the dyes migrated to the fabric at different speeds. To the extent possible, I put my dyes in squeeze bottles when applying them to fabric since it is much easier to apply a controlled amount of dye using a squeeze bottle than by pouring it from a wide-mouthed bottle.
3. Soak the fabric in soda ash soak for 30 minutes. Soda ash soak is made by adding 9 tablespoons of soda ash to 1 gallon of warm water. Wear a face mask when measuring the soda ash. Shake thoroughly to dissolve the soda ash. After 30 minutes, wring out the excess soda ash into the soaking basin and return to the soda ash soak bottle. The fabric can be soda soaked ahead of time and dried over the shower rack (not in the dryer) or soaked right before dyeing. I elected to soak the fabric right before dyeing because I wanted to use it wet.
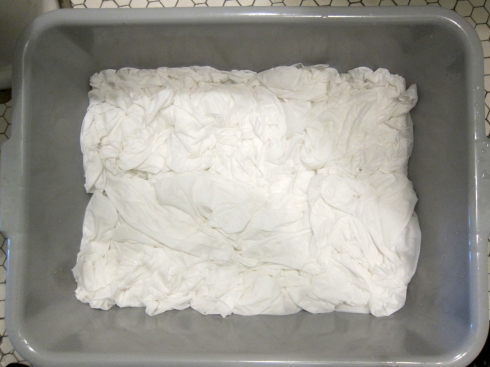
Fabric Soaking in Soda Ash Solution
4. While the fabric is soaking, prepare the dye vessels. I used dishpans with various racks to keep the fabric out of the dye. (Any pans or racks that are used to dye fabric cannot be returned to the kitchen.) Since I didn’t have enough racks, in one instance, I used a piece of old fiberglass screening which I attached to the sides of the dishpan with some small clamps. This was suspended above the bottom of the dishpan. I also decided to snow dye a shibori piece, so I wound the fabric around a pole and compressed it. I dyed this in a bucket. I had no idea how this would come out, but it was worth a try.
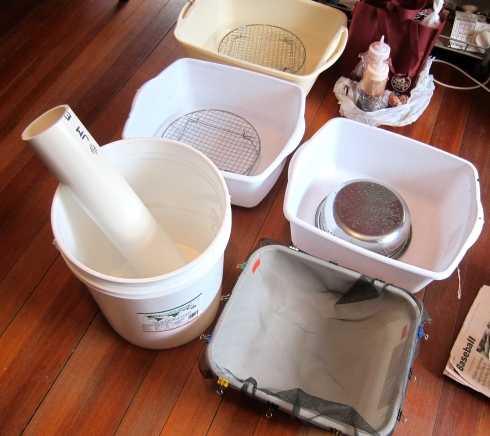
Various Containers with Racks and Makeshift Screen. There is also a pole for shibori snow dyeing.
5. Manipulate the fabric. I experimented with various manipulations, including crumpling into small folds, knotting, crumbling and twisting, folding lengthwise into loose pleats, and wrapping fabric around a pole.
6. Place the manipulated fabric on top of the rack or screen in each of the dishpans. You can dye more than one piece of fabric in a single dyeing container if you want.
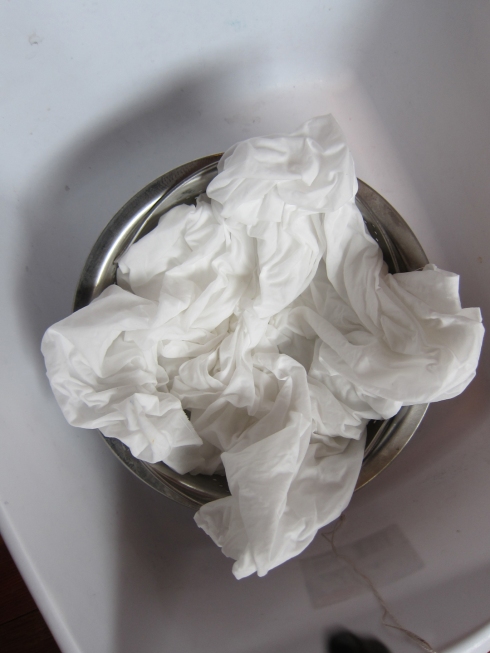
Fabric is Loosely Folded, Knotted and Twisted
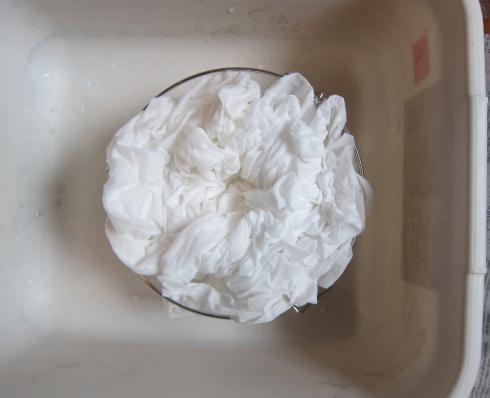
Fabric is Scrumpled Up, Coiled and Crammed onto Rack
7. Fill the containers with snow. The snow from this storm was very light and fluffy, which was good since, when doing previous snow dyed experiments, I discovered that light and fluffy snow gave better patterning than wet or icy snow.
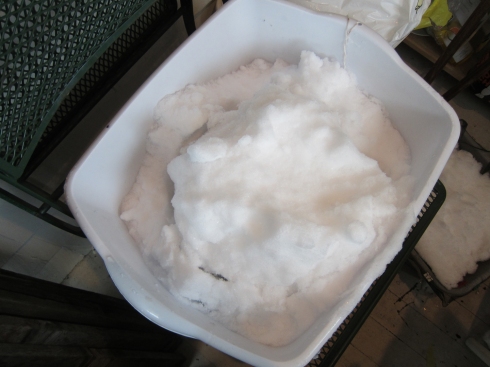
Manipulated Fabric Covered with Snow
8. Squirt dye over the fabric and snow, using several colors of dye. If you’re lucky, the dyes will mix and form lots of secondary colors. This is especially likely is you work with mixed colors instead of pure colors, but both sets of colors will yield interesting results. You can also combine several pure colors ahead of time and use that mixed color as one of your dyes. Experiment with different patterns of pouring the dye over the snow.
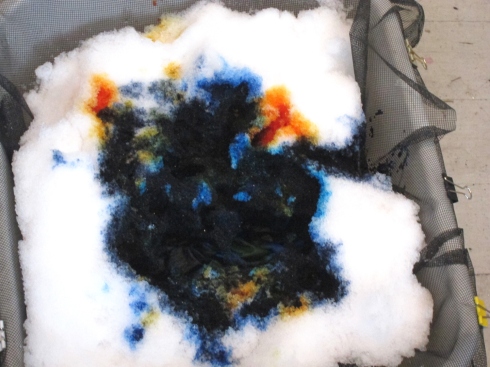
Dye Poured Over Snow. Several Colors Were Used
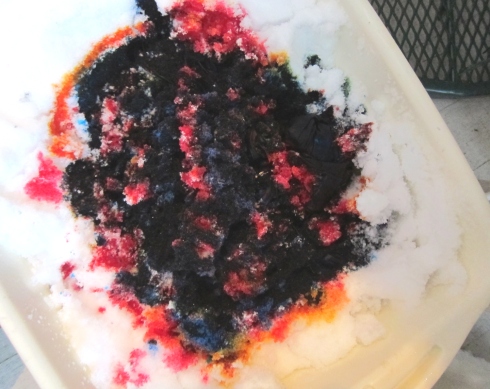
Dye Poured Over Snow
9. Leave the dye containers in a cold place to allow the snow to melt slowly. I left mine on an enclosed, but unheated, back porch for 5 and a half hours. Since the temperature was going to drop significantly, I brought the dishpans into the house before going to bed since I was afraid the snow wouldn’t melt at all if I left the containers on the porch. Leave the containers for a total of 24 hours. The snow will continue to melt and form patterns as it does. Because you are dyeing at a very cold temperature, it will take much longer than normal for the dye molecules to bond to the fabric receptor sites. A 24-hour waiting period will enhance the amount of bonding that takes place.
Dye Changing Appearance as it Melts
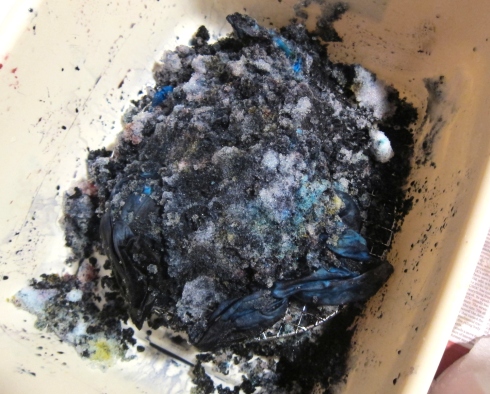
Snow Melting and Dye Seeping into Fabric
10. When I brought the dishpans inside, I peeked at my fabric and noticed that there were a lot of places where the dye hadn’t penetrated. So I massaged some of the melting snow/dye mixture into the white parts of the fabric to encourage more dye pick up. I didn’t know how well this would work but it seemed worth a try. In previous snow dyeing sessions, I didn’t have to do this, so I wondered whether I had used too little dye. (In retrospect, when washing out my dye, I saw that I had indeed used plenty of dye. It took quite a few cold water soaks to get out the excess dye that had not bonded to the fabric.)
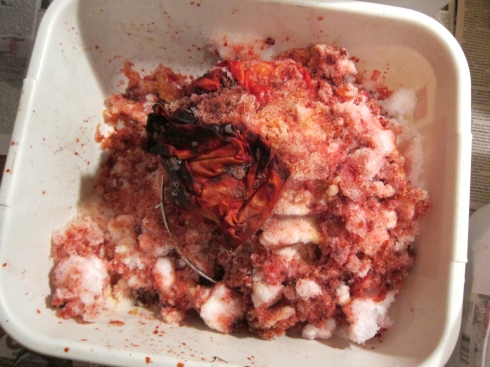
11. The most exciting part of this process is washing out the fabric and seeing what happened to it. I forced myself to wait 24 hours before doing the washout for the reasons just stated. After the waiting period is up, untie/or open up the fabrics and rinse in a bucket of cold water. Change the water several times to get out all the soda ash and much of the excess dye. For this batch of fabrics, I seemed to have a lot of excess dye despite not having been sure that I had used enough. I used several changes of cold water before the water seemed somewhat clear. I also kept the colors separate at this stage by using several washout buckets rather than soaking all the fabrics together in a single bucket. This is especially important if some of your fabrics are light colored. Keeping the fabrics separate prevents back staining in the light portions of the fabric.
12. After you’re satisfied that you’ve gotten out all the soda ash and much of the excess dye, soak the fabric in hot water with a little Synthrapol or Blue Dawn. Because I have a front loading washer, I always add boiling water to my hot water soaking buckets to get the final hot water temperature above 140 degrees. Let the fabric sit in the buckets for 30 minutes or so. This stops all the dyeing action and allows the unbonded dye particles to move into the water.
13. Dump the fabric and the soapy water into the washer and wash on the hottest cycle without adding additional soap. In this instance, because I still had some excess dye in the fabric, I washed the fabric for more than 50 minutes. I washed all the fabric together because most of the excess, unbonded dye had been poured away from the fabric, and back staining was unlikely.
14. Take the fabric out of the washer, admire it, and then dry it. It generally takes 15 minutes on medium heat to dry the fabric I use. Admire your fabrics some more once they are dried. Iron the fabrics to bring out the patterning which is harder to see when the fabrics are crumpled.
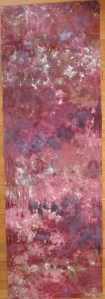
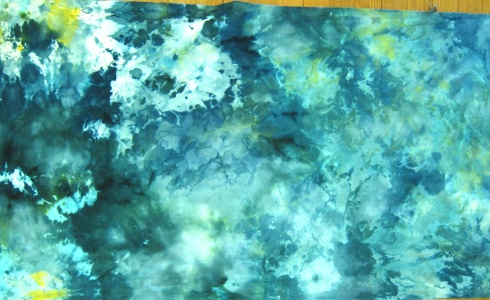
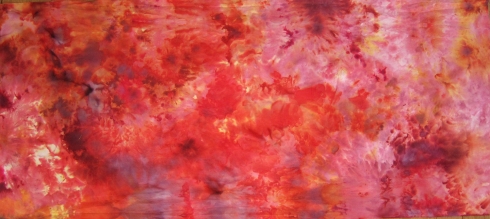
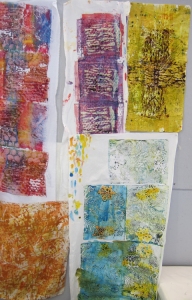
Below are my finished fabrics. The first two were dyed together, and they are variants of the same colors. (The actual colors are somewhat deeper and less pink than shown in the photos.)
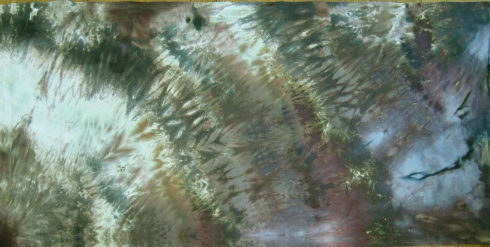
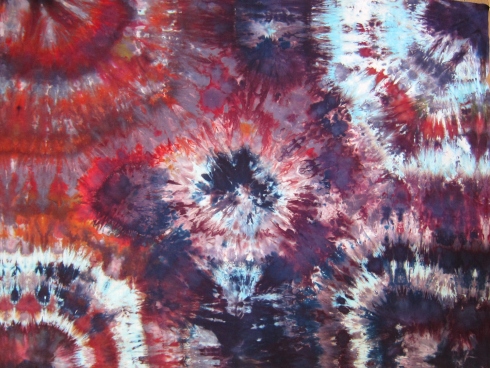
The third photo shows the piece I wrapped around a pole and compressed. I did not use string on this piece, so the resisted lines are more subtle than when string is used.
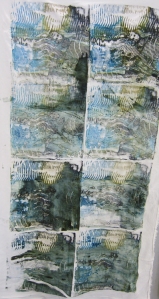
The turquoise piece and the first red piece seemed boring to me, so I decided to over dye these. I resoaked the fabrics in soda ash soak, manipulated them again, put snow over the top and added additional colors of dye that I thought would work well with the original colors. These are still batching as I am writing this post.
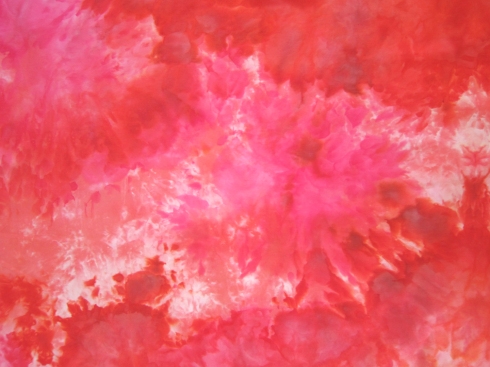
The final piece is my favorite because of the complexity of the colors and the patterns obtained. In this piece, I knotted the fabric loosely in several sections and, in others, tied off sections with rubber bands.
Whatever the end results, snow dyeing is fun and always unpredictable. I’ve found that snow dyed fabrics don’t play well with other dyed fabrics, unless used in small pieces, so I tend to use my snow dyed fabrics for whole-cloth quilts or for backings.